Today is all about making easy homemade baby food! I have had the best time making baby food for Jacob! He thinks the food is pretty tasty and I enjoy the whole process of making it for him, coming up with my own recipes for him, following fun recipes I find, and also I like knowing what exactly goes into his food and into his system.Introducing one new food at a time every 3-4 days and keeping a notebook of what has and what has not been introduced is very helpful in the beginning. Once you have individual foods that have been safely introduced, it’s great to begin mixing the approved individual foods together and having some fun with variety of foods and textures. The notebook also includes information on whether or not he liked or did not like certain foods on their own, and also what happened with different combinations given. I find the notes and photos taken of him trying each food for the first time to be a good little keepsake as well.
It’s not only cost effective to make your own baby food, but it actually takes very little time and is pretty simple to do. The way I look at it is that it’s real food that our family would be eating anyway, but made a special way for baby. It actually comes out to be cheaper than buying pre-packaged pouches or containers of baby food. It’s totally up to the parents to decide whether or not to strictly buy organic due to chemicals and pesticide use. Many choose to buy mostly organic. The best advice I have for deciding this or not is to do your own research and make the choice that fits your family best. I like to go to Whole Foods Market and it is a great place to go to get great quality organic fruits and veggies, but there are certainly other stores to choose from. If you are unable to find something that is out of season, its perfectly fine to buy frozen organic. Milled brown rice and oatmeal can be mixed in the fruit and veggie purees to experiment with different textures, as long as they have been introduced safely individually. I am mindful to thoroughly wash all fruits and veggies before making the food I will give to him. I did lots of research on making homemade baby food so that I could fully know the in’s and out’s before embarking on the journey! So, this is about what has worked for me and I wanted to share with others.
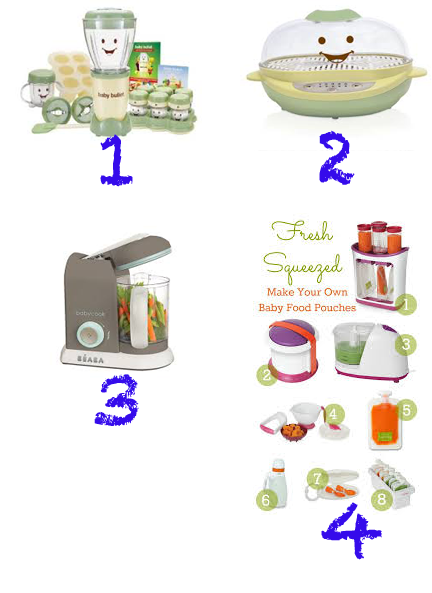
You don’t have to have fancy equipment to make baby food at home in your kitchen. Any type of blender or food processor will help you to puree everything. You’ll also need and some sort of steamer and/or your oven is all you really need depending on what foods you choose to make. I tend to make baby food in very large batches so the freezer is stocked and I can easily grab cubes of frozen baby food and go. It takes about an hour to make a large batch of different varieties and I am always sure to thoroughly wash and clean the parts before making each new puree during these marathon sessions. There are several “nice-to-have” products out there to also help you to make baby food. Here are just a few among many great ones on the market:
1.Baby Bullet Food System / 2.Baby Bullet Steamer / 3.BEABA Baby-cook / 4.Infantino Fresh Squeezed Collection
I use our Omega J8006 Juicer since it has a baby food making attachment to puree the fruits and veggies, and either my oven to bake or roast things, or my double vegetable boiler/steamer pots on the stovetop to get things nice and soft so they are all ready to puree. The steamer/boiler pots on the stove come in handy because they allow me to preserve the nutrients from steaming that have seeped down into the water in the pot that is below the steam pot. I pour this nutrient-rich water in the puree and mix together before freezing in cube trays. Plastic freezer bags are great and make it really easy to quickly pick and choose what cubes you are going to either use alone or what you will mix together for each meal. Just be sure to keep separate baggies for each food choice (example: one baggie of banana cubes, one baggie of green bean cubes, one baggie of apple cubes). Keeping separate baggies also helps because if you mix certain things together for a meal and baby hates it, you have not wasted more than just those cubes used for that particular meal. You can later use the individual cubes you still have frozen of that particular food to make new combinations that maybe baby will love. The cubes defrost fairly quickly either at room temperature on the counter for about an hour, in the fridge the day before, or even defrost for 5-10 seconds in the microwave. The frozen cubes are very easy to travel with for now by using glass or plastic small food containers. I use a small soft travel cooler and put the servings on ice for long trips. Organic feeding pouches are also an option for on the go if you choose that route so there’s no need to worry with keeping things cold. It’s so easy to increase the amount of frozen cubes as your child needs more food at each meal with the cube method – each cube yields approximately 1 ounce just for a quick reference point. You can also make recipes you find online in big batches and freeze in cubes. I love these unique and fun recipes by BEABAusa. The bananas foster baby food recipe is yummy and Jacob approves! More recipes are here.
Items I use:
Apple Cider Vinegar and water mixture to clean produce
Peeler (for some fruits and veggies)
Double Steamer/Boiler pots (Similar here)
Freezer baggies (I like quart and Gallon size for this)
Washi Tape and a Sharpie
Kozzii Kiinde Breastfeeding Gift Set and Kozzii Foodii feeding systems and pouches with spoon attachments
Plastic freezer safe storage containers and also small glass canning jars with lids
Ice cube trays /baby food making trays (I love these)
Bowls, spoons, mugs, and spatulas
Colander
***For some recipes you’ll need formula or breastmilk to thin out the purees or you can use water 🙂 ***
Directions
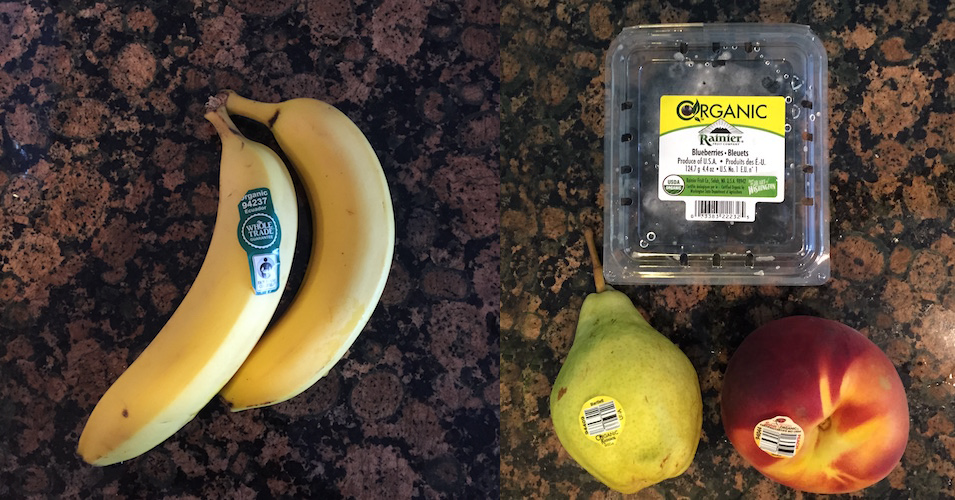
1.Gather your fruits and/or veggies to be used (on this particular day I was making apple, blueberry, pear, banana, and peach purees). Since some foods such as avocados and bananas are pretty soft already, I just run these straight through my Omega and add Infant Water to make cubes. There’s no need for steaming those foods that are already pretty mushy. Some recipes require adding breastmilk or formula or you may choose to use either to thin out the purees or to add in the recipes.
2.Wash fruits and veggies with a solution of apple cider vinegar and water: combine 1 Tbsp of apple cider vinegar with 1 cup of water in a bowl. Put produce in the bowl and allow to sit for 5 minutes. Stir and then agitate while the vinegar does the job. Remove the produce and rinse very well using a colander. Allow soft fruits like peaches and berries to air dry completely on a towel. Harder fruits such as apples and mangoes can be hand dried using a towel.
3.Peel any necessary fruits and veggies. Some require an ice bath for easy peeling of the outer skin after boiling for a few minutes whole, such as peaches. Cut up fruits or veggies in small pieces after washing and peeling. Boil/steam/bake/roast until soft. Save the nutrient-rich water in the bottom pot for mixing in the puree. You’ll notice that this water is slightly colored the same as what ever food you steamed and thats perfectly fine. *Do not use cooking water from carrots to thin out baby food. Read more about that here.
4. Put pieces in blender or food processor until smooth. Add water or breastmilk/formula to get the desired consistency you want based on what stage food you are making (if you are using water ,nutrient-rich water is best from the steaming step if you saved it or have it left over from steaming…I save mine in mugs and pour into the puree as needed.)
5. Fill trays using utensils, label trays using Washi Tape (any excuse to use Washi, right???), and freeze until hardened. At this point, I sometimes keep a bit of puree out of the freezer and simply add some to mini glass canning jars or small plastic food storage containers to store in the fridge for up to 3 days if it is a puree that he will have within the next 3 days.
6. Once frozen, simply pop out cubes of food and put them in freezer baggies labeled (I use Washi, of course! haha) with the name of each food and the date made to easily grab when needed. Target’s UP & UP brand makes some awesome dishwasher and freezer safe BPA-free mini oval storage containers at a great price that I love for on the go. They are just the right size for baby food! Find them here. I like to put cubes or fresh puree servings in these and throw them in the baby bag when I need them while being out and about. I prefer to serve his food out of the mini glass canning jars with lids for when we are at home. I love our Kiinde Foodii system! It is awesome for making the homemade purees into handy to-go pouches with a no mess spoon attachment 🙂
*TIP: check out the baby food section of stores and take note of different mixtures they sell. This helps you to find new concoctions to mix together for your baby. Just toss the individual cube flavors in whatever container, defrost, and stir. Milled brown rice and oatmeal made at home is also great to mix in when baby is ready. I really like to model after the Beech-nut combinations and like to mix in Beech-nut single-grain cereals from time to time since my son has a cow’s milk intolerance and this brand is safe for him to have.
I have found these sites useful to assist when finding concoctions, information, and specific recipes to make the purees for baby: site 1 , site 2, site 3, and site 4. These sites aid in knowing what foods are good for stage 1, stage 2, and stage 3 baby food as well as knowing which foods you may want to avoid at certain stages and which have a high nitrate content. Making your own baby food allows you to control the texture of foods for your baby for different stages when ready. Chicken and turkey can be pureed and mixed in as well. Just be sure to get the okay from your child’s pediatrician on when to incorporate any dairy or meats.
I hope you found this useful! Please be sure to pass the info along if you know someone who may be interested in making homemade baby food. It really is such a rewarding process! Have a great day!


